Free space (online through Watches)
Setup of monitoring of free space
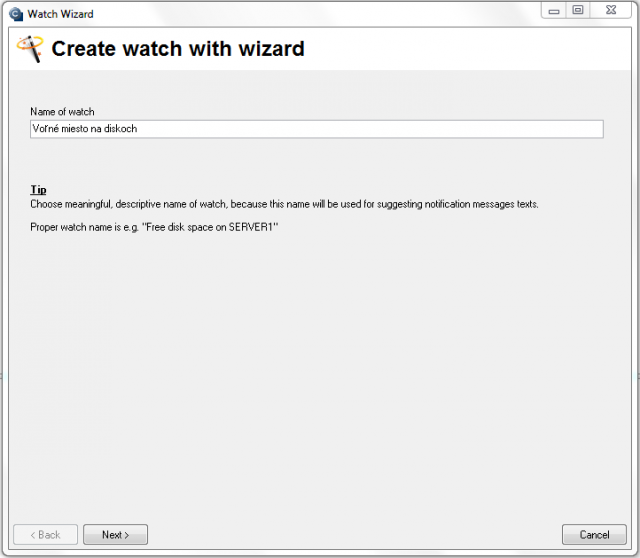
The very setup is done through C-Monitor console by adding a Watch, for simplicity directly through the Wizard. Launch Watch Wizard, name the new watch e.g. "Free space on drives", and press Next.
In section Health of system select the item "Free space on disk", and press Next.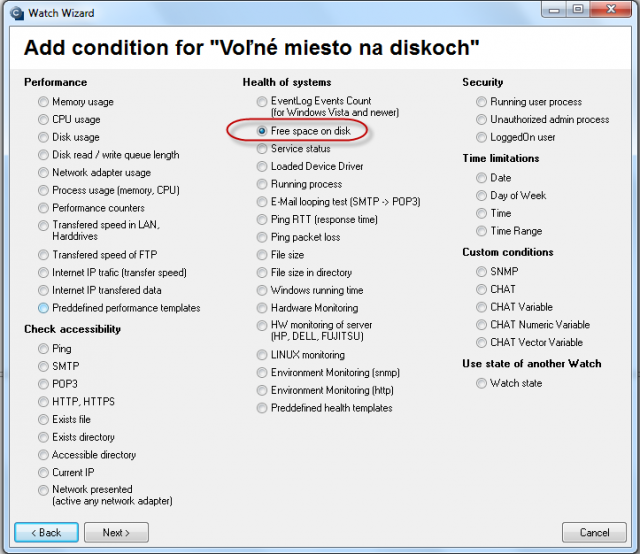
In the next window, click on the Disk icon, and a window with a list of available disks will pop up. Double click to select the disk that you want to monitor, or select it and press OK.
If you need to add more disks into one watch, these can be added in the next steps

Now set parameters, by which will the state be monitored: operator (> or <), the very value (Free space), and also Unit, for which you can choose from %, kB, MB, GB.
You must also set the value, at which change of the state of free space is sent to the CM Server - "If value change more than". As the server should not be unnecessarily loaded, choose a reasonable (higher) number, but such, that the view on CM portal shows relevant changes of the monitored parameter.
Example: you want to set notification when the free space gets below 10GB, the value for change may be set to 1GB. In this case, each change of the free space status, which is over 1GB, is sent to the CM Server.

In the next step you can set judgement of the watch's state (Assess the state of watch). If ticked, you can set evaluation of the watch into state Unknown even if the value is True, False or Unknown.
Common settings for all Watches
The next displayed window contains settings that are common for setup of every watch, so you'll see these options pretty often.
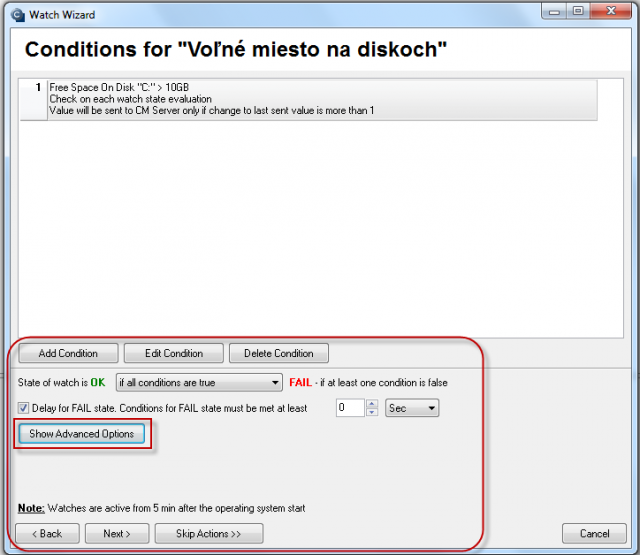
First of all, there's an option to add another condition, in our case, if you have more drives that you want to monitor, add a separate condition for each one. Changes in already existing conditions are performed through Edit condition, and you may also Delete conditions.
In this window you configure at what state of conditions is the Watch OK, or FAIL. This is set in the box next to the text "State of watch is OK". Set this value according to your requirements.
By ticking the field Delay for FALSE state, you can set a delay of submission of the state's change. If you know that the watch will sometimes be in the FAIL state for a short time, use this option to prevent vast and useless amount of notifications.
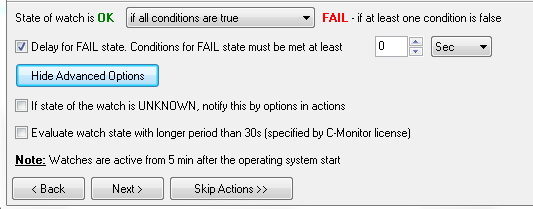
After clicking on Show Advanced options, two more settings will appear.
The first one is, that the action is carried out even if the watch's state is Unknown
The second one is evaluation of the watch's state in a longer period than 30 seconds
Setup of Actions
If you click on Skip Actions, the setup of actions will be skipped and stays in the default state. You'll see a summarizing window with settings and after pressing Finish, the watch is successfully configured.
By pressing Next, you'll set the actions that are executed after change of the watch's state.
There are three types of actions: Start, Repeat and End.
Start Actions
The action always has to be enabled
After it's enabled, various notification options will become available. You can enter a custom text, which will also be stated in the notification email or SMS message, into the field Description of FAIL state. You can then configure delay of the action's execution when the watch is switched to FAIL.
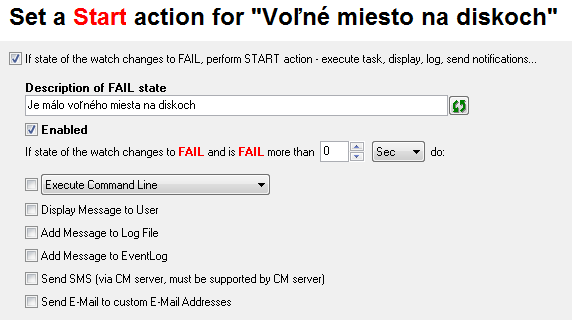
More actions may be selected at once. In the first option, you can have an already created script, e.g. a .bat file, a trigger, or a service check executed. After selecting Execute Command line, find an existing file on the drive, and then have it signed/verified (the key icon).
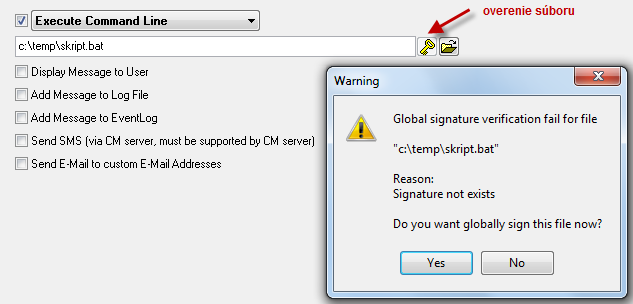
The verification must be successful, otherwise CM wouldn't allow execution of the script.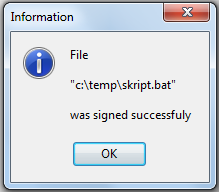
After selecting Activate trigger, enter name of the trigger into the blank field
After selecting Control service, you'll have a command executed for a service, start, restart or stop. Click on the icon for list of services on the right, search and select the required service and press OK. Then choose the required operation for the service.

Other notification options are :
- display message (window/balloon) to the user on desktop
- add a record to Log file
- add a record to Event Log on PC
- send SMS
- send email message
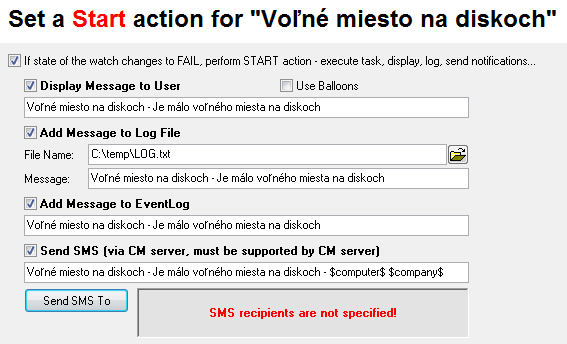
For sending of SMS, it's necessary to choose recipients, whom the message will be sent to, by clicking on "Send SMS to"
Email is standardly sent according to operators' settings in CM, eventually the receiver's address can be adjusted, or changed. After setup of these custom notifications, press Next.
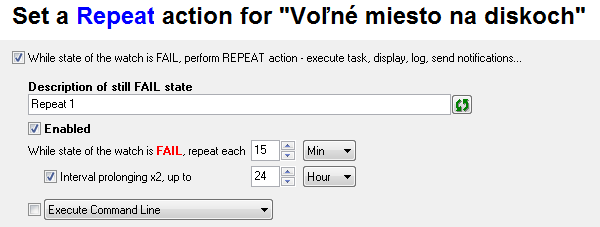
Repeat Action
You'll see a window for setup of repeat actions.The options are almost identical, the difference is in the option to set repetition time and interval, till which are the repeated notifications going to be sent.
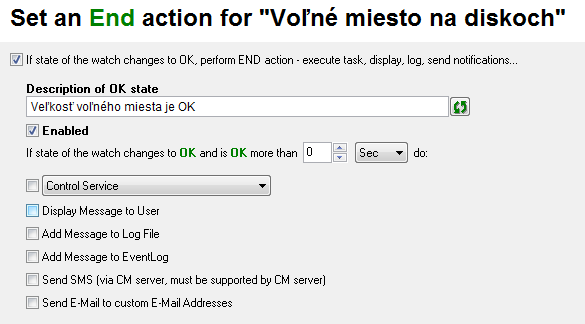
End Action
After setting the repeat actions, and pressing Next, setup End action. The options are the same as for the Start action.
Afterwards, just press Next and you'll see a summary of all settings.
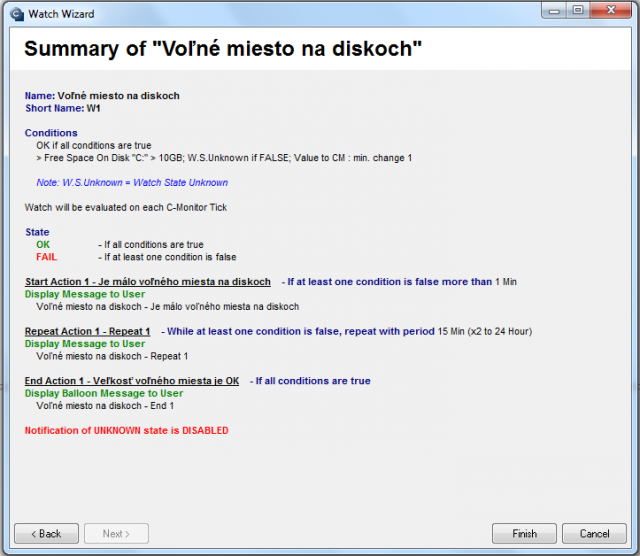
By clicking on Finish, the watch's setup is completed. If you've chosen the watch as Enabled, then you can view its state directly in the C-Monitor console on the PC, in the top left menu watches state

or also through CM portal in the section Presentation and evaluation, in the left menu Watches (online monitoring)


